Last Updated on 2022-07-08 by Joop Beris
If, like me, you like to use the openSUSE Linux distribution, both personally and professionally and you need to connect to a VMWare View environment, you’ll be unpleasantly surprised: there’s no supported client for openSUSE or other RPM based distributions. There is however, an Ubuntu package..
Fortunately, it is possible to convert a Debian/Ubuntu package (.deb) to a RedHat/openSUSE package (.rpm). We can do this using the utility called alien, since we are dealing with an alien package format for our system. It is possible that alien is not installed on your openSUSE installation. So the first order of business is to install it. The easiest way to do that, is by using the 1-Click-Install from the openSUSE 13.1 repositories. Point your favourite browser here: http://software.opensuse.org/package/alien. I chose the Utilities repository and clicked the 1-Click-Install link. This adds the repository to your system and installs alien for you. Just input your root password and the installer will do the rest. Alien needs the rpmbuild package for the conversion we are about to do, so let’s install that too. For this, we use the following command, entered on the command line:
$ sudo zypper in rpmbuild
With alien and rpmbuild installed, we are ready to download the VMWare View client itself. At the time of writing, you can do that by looking in the Ubuntu repositories at this location. Scroll down to the bottom for the latest client (currently version 2.2.0 for Ubuntu 14.04). Or just click here for the direct link to the .deb package.
Should your installation offer to open the package with an installation tool, ignore that and instead save the package to disk. The openSUSE installer doesn’t know how to handle .deb files.
The package I downloaded is called vmware-view-client_2.2.0-0ubuntu0.14.04_i386.deb. We are now going to use alien to convert the .deb package to .rpm, which openSUSE can handle. Switch back to the command line and go to the directory where you downloaded the file. There, issue the following command to do the conversion:
$ sudo alien -r vmware-view-client_2.2.0-0ubuntu0.14.04_i386.deb
After a few seconds the process should be finished. In the directory, a new file should appear, called vmware-view-client-2.2.0-1.i386.rpm. This package can be installed with the zypper command as follows:
$ sudo zypper in vmware-view-client-2.2.0-1.i386.rpm
Again, this will take a few seconds but should finish without warnings. If the installer asks to install additional packages (dependencies), allow it to do so. However, I found out that the VMWare View client won’t start right away after installation is finished, even if you’ve installed additional packages. By launching it from the command line, I found out it was missing the zenity package so go ahead and install that before you try to start the client the first time.
$ sudo zypper in zenity
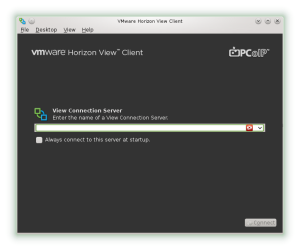
Zenity may require additional packages again, so install those too. After that, the VMWare View client should start and allow you to connect to your View environment as you as you are used to, using the PCoIP protocol. There’s even an icon in the launcher.


Nice!..thanks for sharing mate!..tried it on OpenSuse 13.2 and works just fine.
Cheers!
Hi Wilee,
Thanks for the feedback and good to hear it’s still working. If you followed my instructions literally, it might be worth to check for a newer version of the VMWare View client by now.
Best regards,
Joop
Hi ,
I have installed the same and not able to connect the ESXI coz its says certificate error. Can you please guide me how to install the certificate..
Hi Deepak,
This sounds like it has nothing to do with the client but rather with the certificate your ESXI host is offering. Is it a self-signed cert or a cert that is not signed by a well-known CA?
You might try installing the cert on your computer. I think this post on the openSUSE forums will help you: https://forums.opensuse.org/showthread.php/445106-How-to-import-root-CA-into-system-wide-trusted-store?p=2611279#post2611279
Good luck!
Awesome, so useful. Thanks for posting 🙂
Thanks for your feedback. Glad you found this useful.
You’re welcome! Glad it was useful for you.
Thanks!! Really needed this coming from Ubuntu